Photoshop Tutorials
_________________________________________________________________________________________________________________________________
(All of these tutorials can be found by going to: http://www.screenr.com/user/sbcaart )
DISCLAIMER: I'm sorry for all of the times I've stuttered, tripped over my words, & said "umm!!!"
Talking is not my specialty & is so much harder when being recorded. Please bear with me. :)
- Mrs. Parsons
_________________________________________________________________________________________________________________________________
1. General Overview of Photoshop's Capabilities (3:33): http://www.screenr.com/Uq07
This tutorial gives examples of what can be created in Photoshop as well as a short introduction to layers.
2. Interface Overview (4:29): http://www.screenr.com/qF07
Explains Photoshop's workspace & introduces the canvas, menu bar, tools palette, navigator window, color swatch window, & layers palettes.
3. Basic Navigation (4:15): http://www.screenr.com/7L07
Explains tabs, drop-down menus, hidden/collapsed palettes, deleting palettes, changing palette sizes, etc.
4. Tools Palette - Basic Overview (2:30): http://www.screenr.com/4L07
Briefly explains how to navigate through the Tools Palette
5. History Palette (4:10): http://www.screenr.com/XL07
How to undo changes and see your document before & after.
NOTE: I forgot to add this particular point---The history palette will only record a certain amount of edits at a time (approx. 20). Therefore, if you make 79 edits to your document, only the last 20 will be available to undo.
6. DPI (Image Resolution) (4:24): http://www.screenr.com/iL07
This tutorial explains the importance of image resolution and dpi (dots per inch).
7. Creating a New Document (4:22): http://www.screenr.com/5q07
Setting the width, height, & resolution. Creating a preset. Introduction to the rulers.
8. Layers - Part 1 (5:00): http://www.screenr.com/vq07
Detailed explanation of the layers palette--hiding/revealing layers, creating new, deleting, copying, changing layer order, renaming, changing opacity, etc.
NOTE: The last couple seconds got cut off. I was trying to say that you can change the opacity of each individual layer. 100% is full opacity (no transparency). Any percent less than that will make the layer transparent in some way. (Example: 50% opacity = 50% see-through).
9. Layers - Part 2 (5:00) http://www.screenr.com/8er7
Grouping, linking, merging, & flattening layers.
10. Free Transform (4:58): http://www.screenr.com/Wu07
Using the "Transform" options enables you to re-size, rotate, and flip objects.
11. Move Tool (2:30): http://www.screenr.com/hP07
12. Foreground & Background Colors (2:42): http://www.screenr.com/kP07
13. Zoom Tool (1:54): http://www.screenr.com/jsr7
Zooming in & out on various parts of your canvas.
14. Saving Documents - TIFF vs. JPEG (4:57): http://www.screenr.com/wan7
Saving a file with layers--use TIFF (or PSD)
Saving a flattened file--use JPEG
_________________________________________________________________________________________________________________________________
|
20. Shape Tool - Part 1 (4:10): http://www.screenr.com/fP07
Introduction to the 6 types of shape tools. 21. Shape Tool - Part 2 (2:13): http://www.screenr.com/JP07 More in-depth tutorial on the shape tool options. _________________________________________________________________________________________________________________________________ |
|
22. Type (Text) Tool - Part 1 (4:54): http://www.screenr.com/8e07
Text boxes, fonts, font styles, font size. 23. Type (Text) Tool - Part 2 (4:30): http://www.screenr.com/pe07 Text warping, alignment, color... 24. Text-Filled Letters (4:00): http://www.screenr.com/K5n7 Add this cool idea to your "Type Tool" project! _________________________________________________________________________________________________________________________________ |
|
25. Introduction to Keyboard Shortcuts (3:15): http://www.screenr.com/77G7
26. Ruler & Ruler Guides (5:00): http://www.screenr.com/XcG7 One Last Tip (1:20): http://www.screenr.com/4cG7 How to show the rulers. Why ruler guides are helpful & how to place, alter, hide, & delete them. NOTE: If your objects aren't snapping to the rule guides, go to "View" (at the top), and make sure "Snap" is checked. 27. Brush, Pencil, & Paint Bucket Tools (4:31): http://www.screenr.com/BFG7 These are pretty simple, straight-forward tools to learn. I briefly go over each of them. _________________________________________________________________________________________________________________________________ |
|
28. Vector Shapes vs. Pixel Shapes (3:14): http://www.screenr.com/b5n7
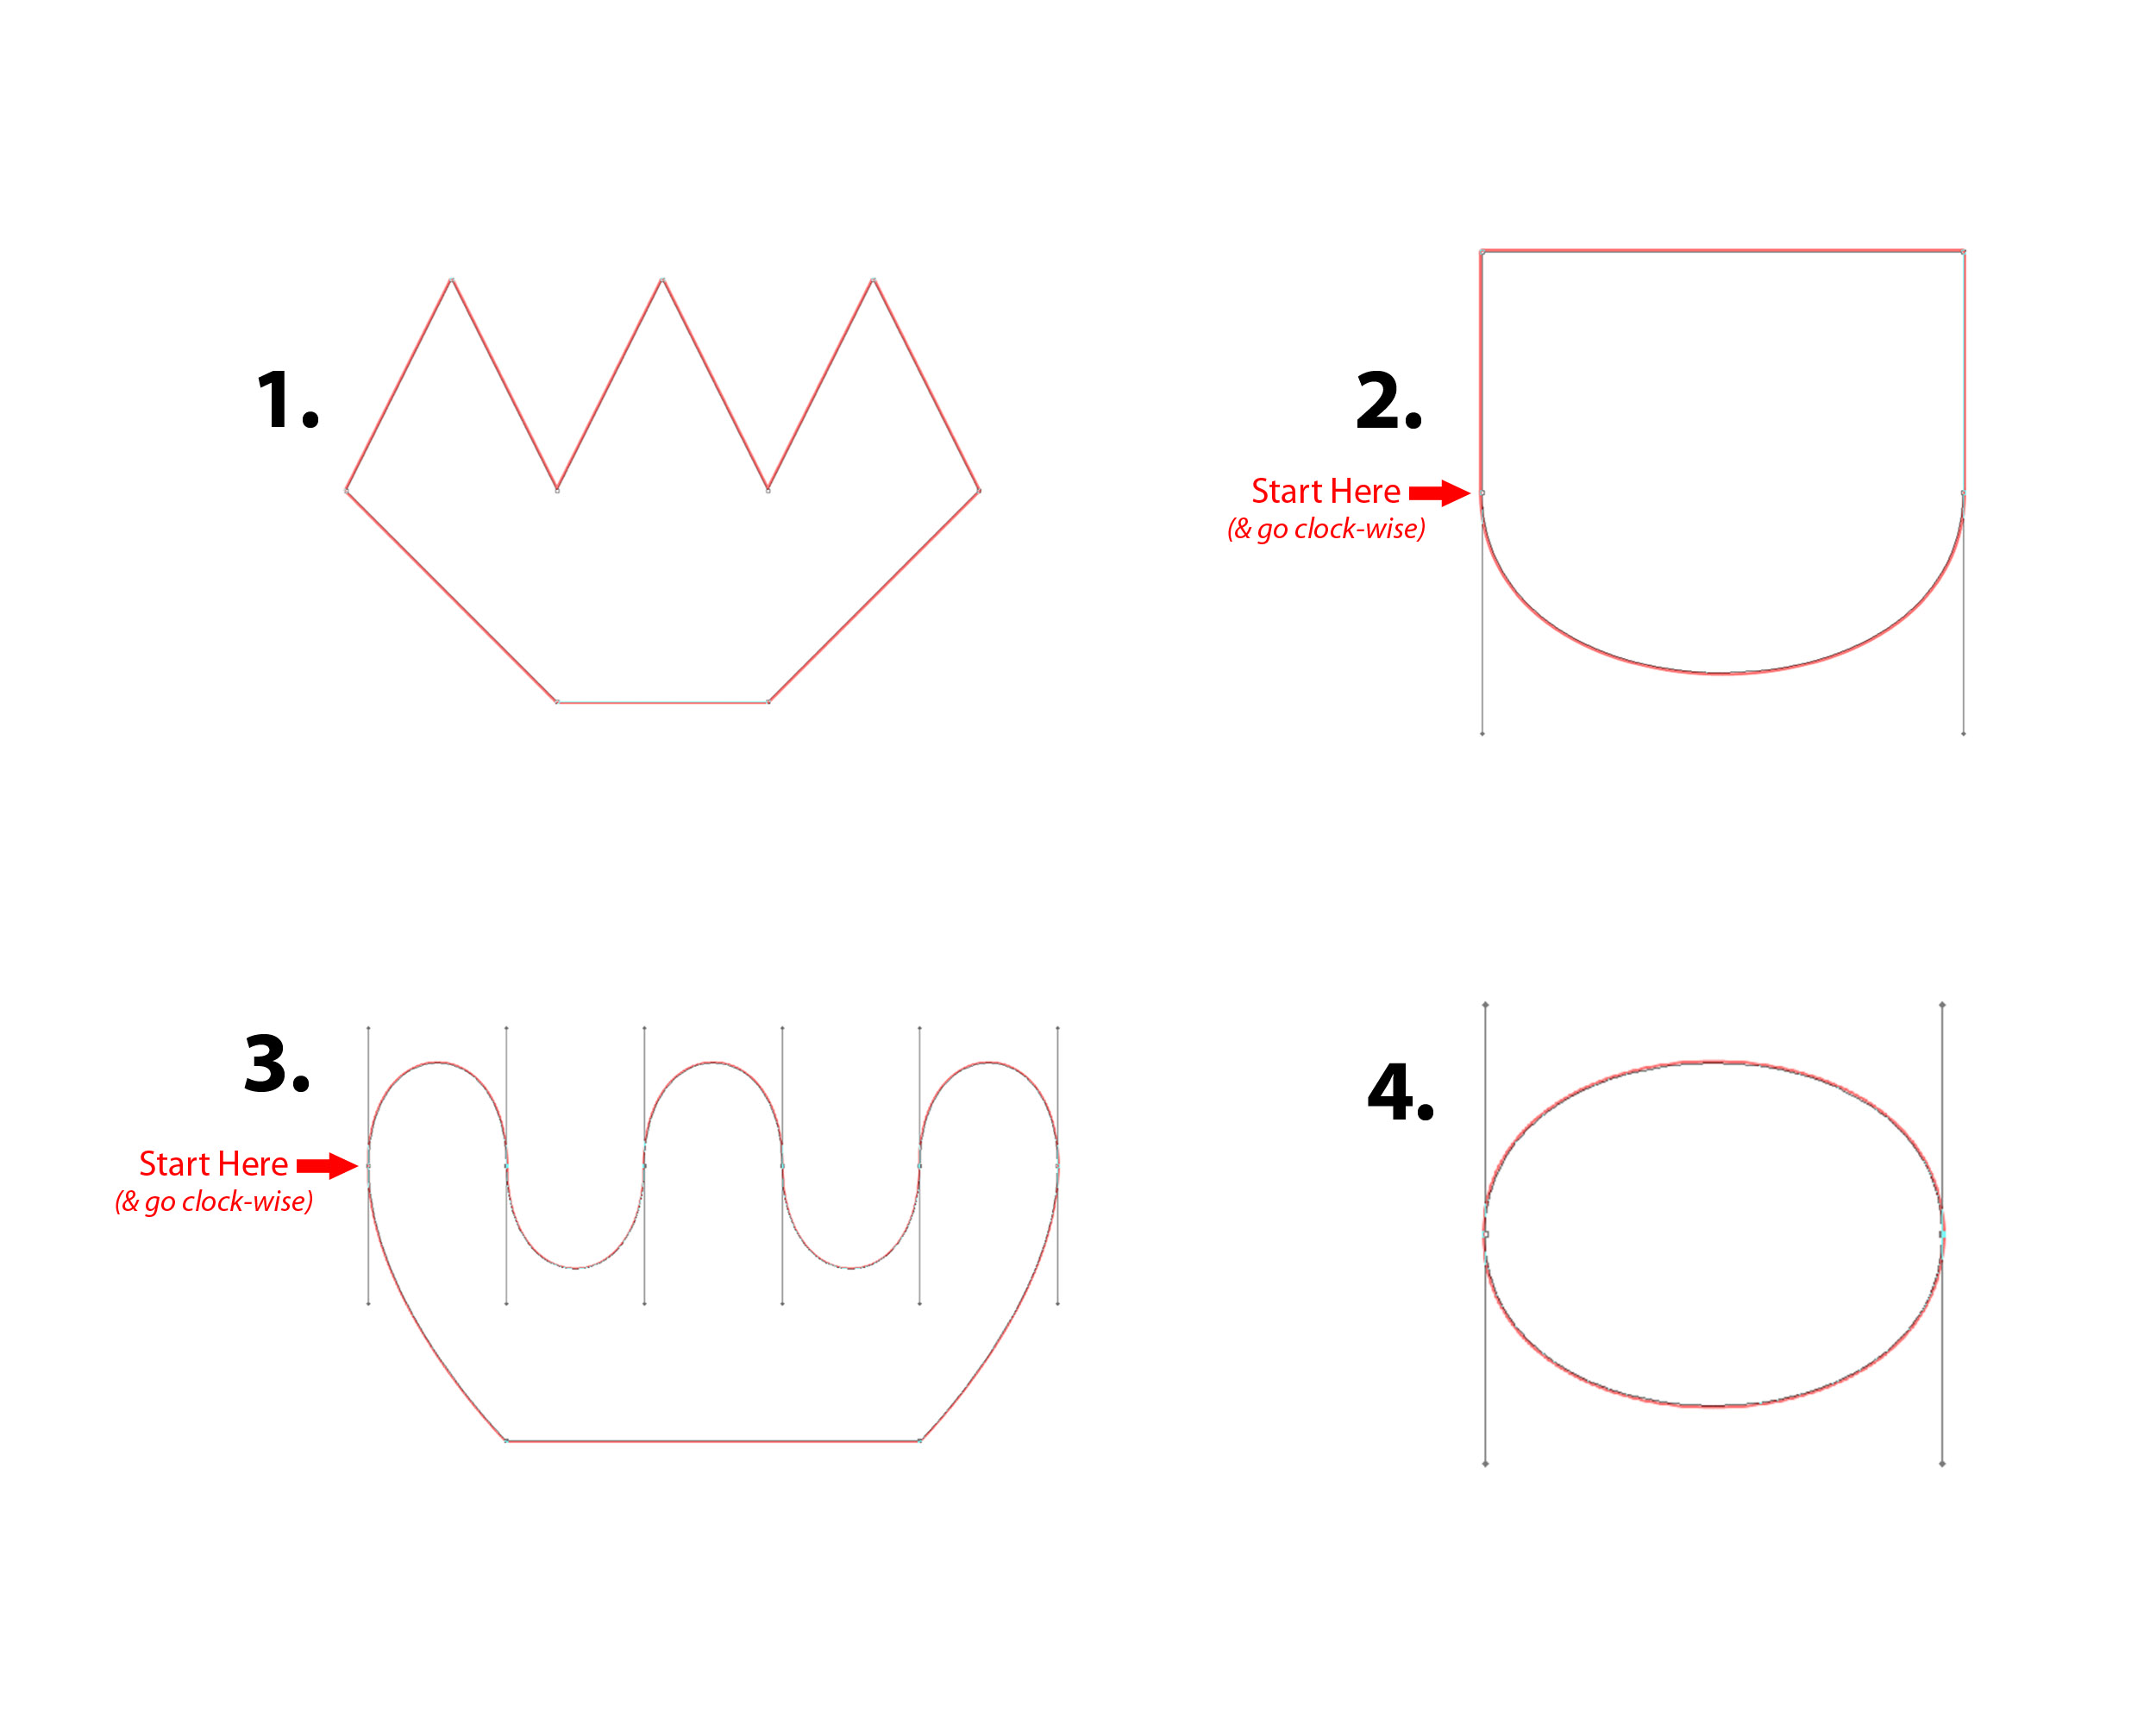
Introduction to vector shapes and why they are so valuable. 29. Vector-Based Tools (2:47): http://www.screenr.com/Win7 30. Pen Tool - Part 1 (4:45): http://www.screenr.com/fin7 The majority of this video is taken from Terry White's tutorial on the Pen Tool basics. His full tutorial is found here: http://tv.adobe.com/watch/creative-suite-podcast-designers/how-to-use-the-pen-tool-in-adobe-illustrator-photoshop-and-indesign-cs6/ 31. Pen Tool - Part 2 (4:52): http://www.screenr.com/5in7 32. Pen Tool - Part 3 (4:45): http://www.screenr.com/7wn7 Holding down "shift" to create precise angles and thinking of the handles as "magnets." 33. Outlining Shapes with the Pen Tool (4:46): http://www.screenr.com/S9n7 Turning a pixel shape into a vector shape. Also explains how to undo points & close a shape. _________________________________________________________________________________________________________________________________ |
|
||
|
34. Pen Tool w/ Keyboard Shortcuts - Part 1 (4:05): http://www.screenr.com/W7G7
This tutorial explains how keyboard shortcuts are used to enhance the pen tool process. This is how I use the tool. I find that it goes pretty quickly & renders great results. 35. Pen Tool w/ Keyboard Shortcuts - Part 2 (5:00): http://www.screenr.com/t7G7 Continuing to explain how I use the pen tool. (Zooming in & out...spacebar to move canvas...dragging handles for precise curves...etc). _________________________________________________________________________________________________________________________________ |
|
||
|
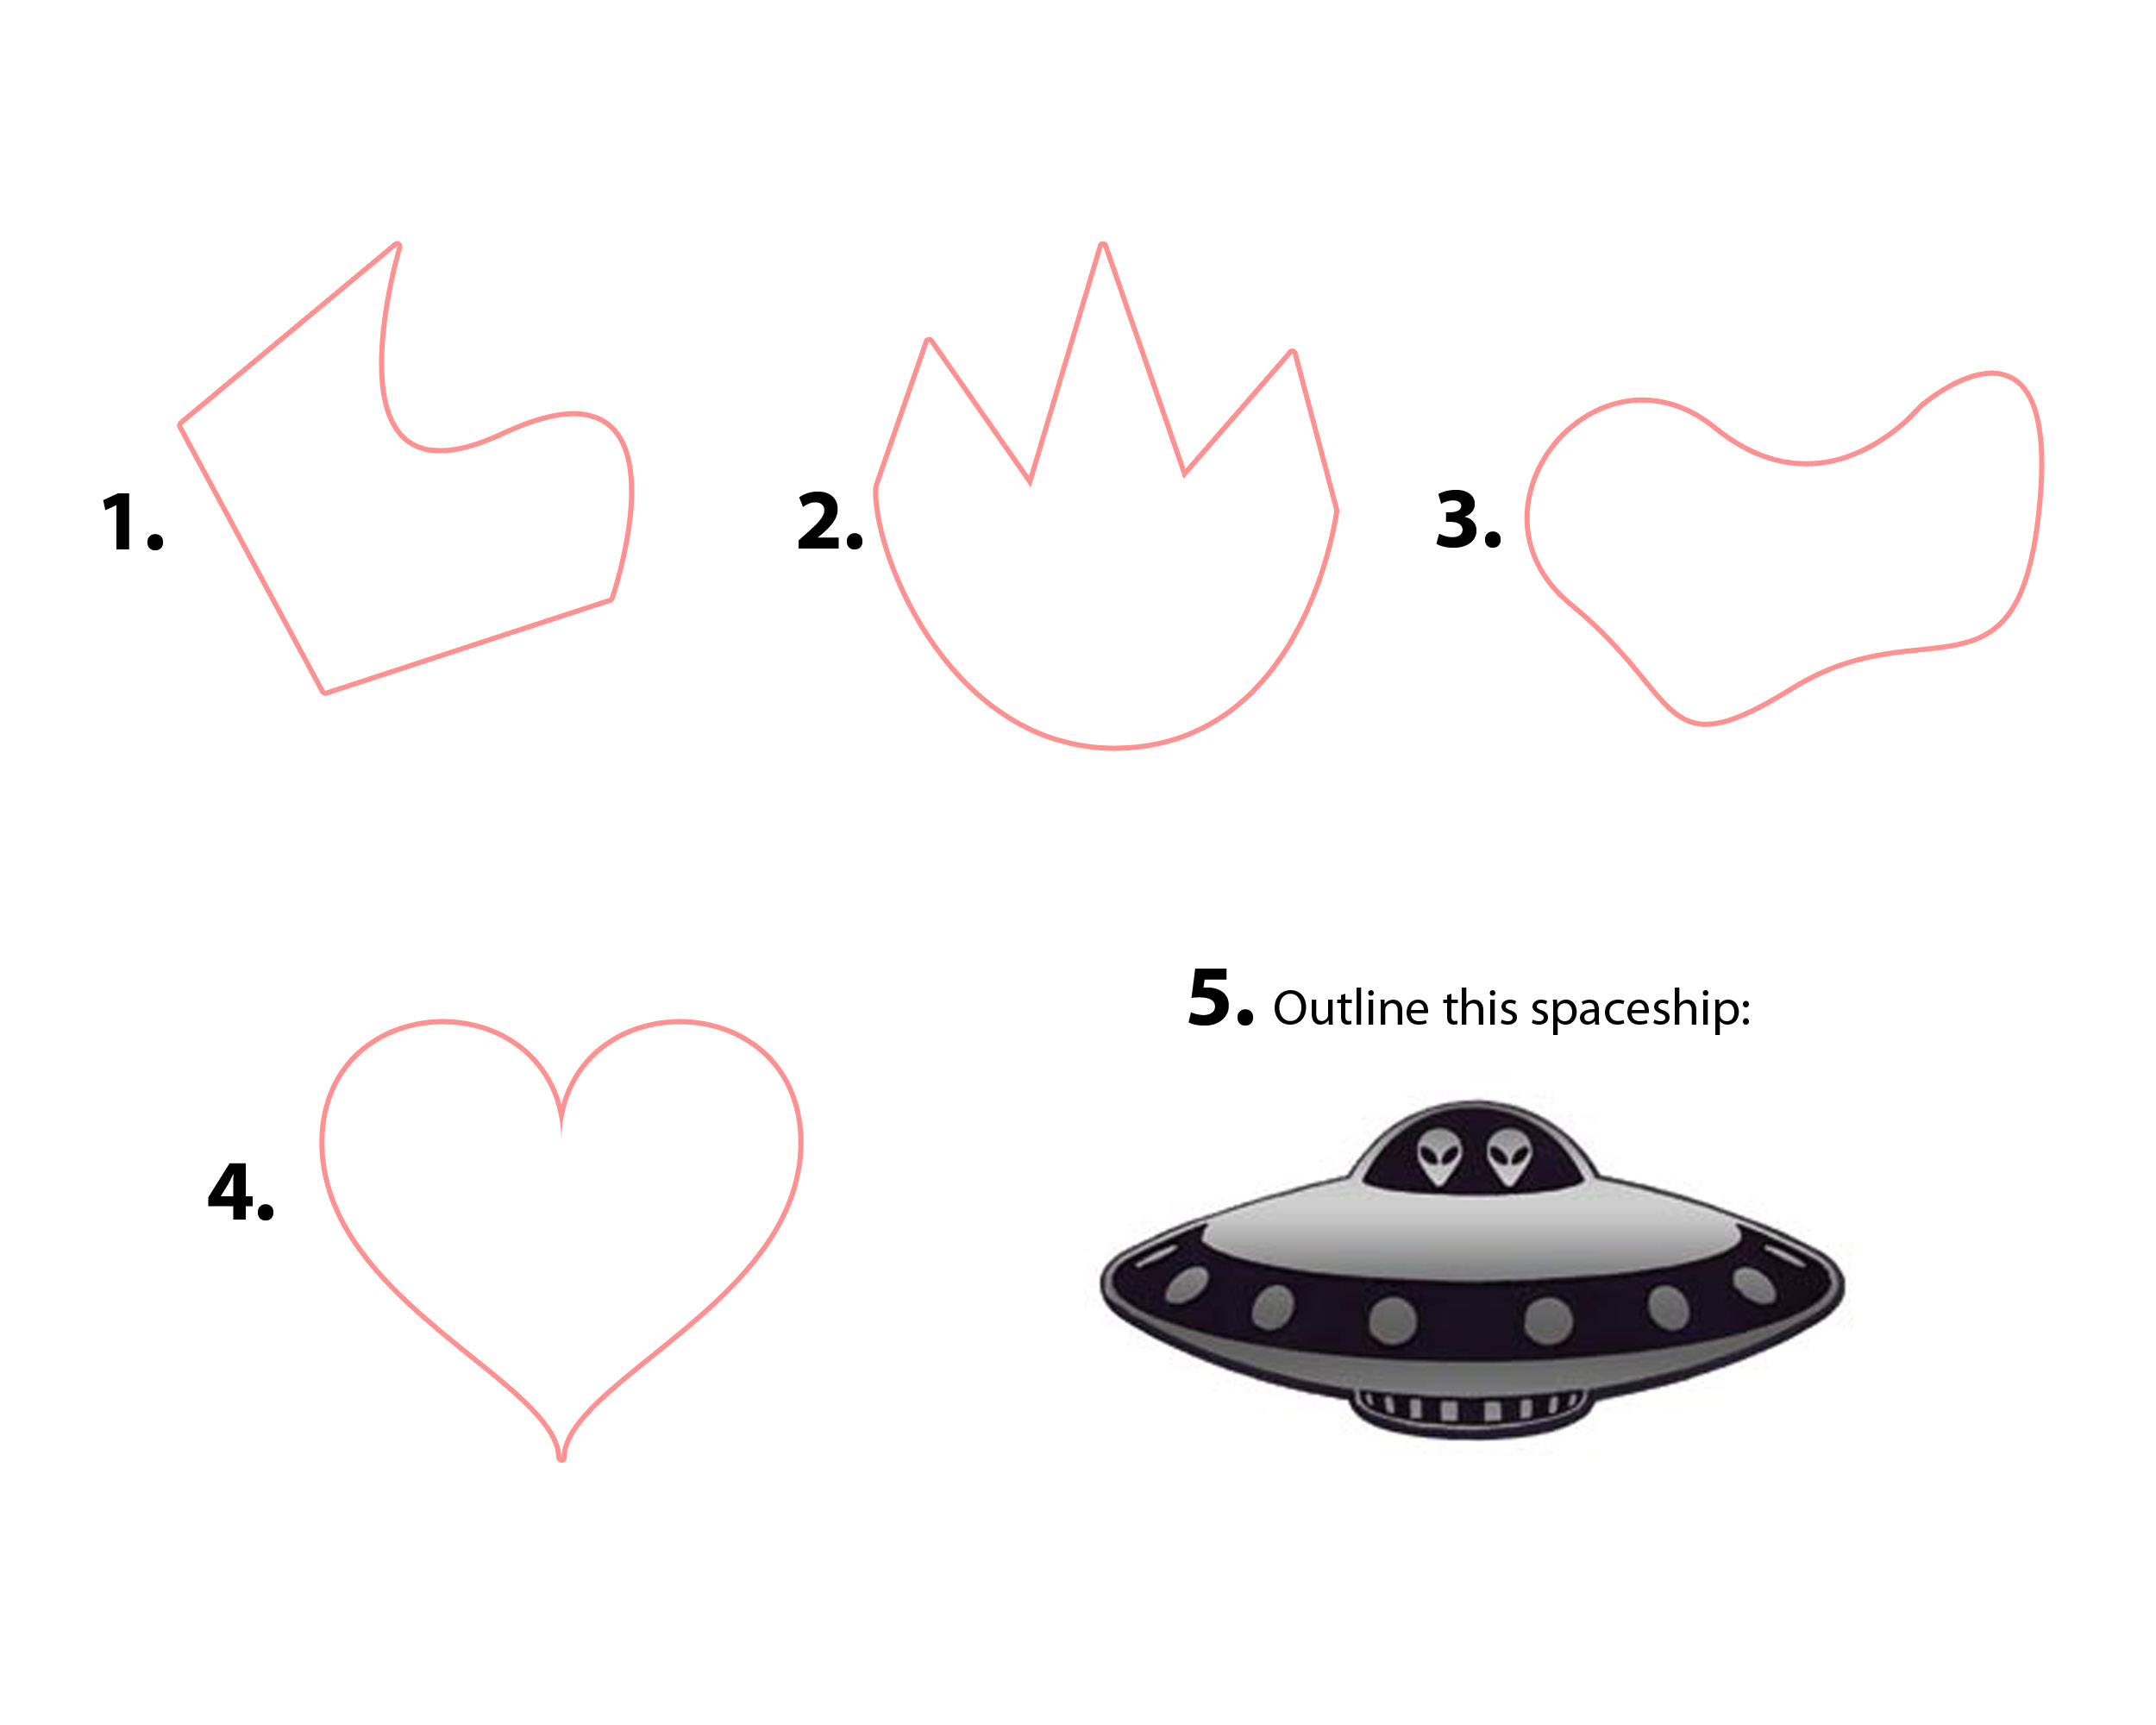
36. Pen Tool Project - Part 1 (5:00): http://www.screenr.com/q4L7
How to outline a hand-drawn picture with the pen tool. (What shapes to start outlining & how to choose exact colors). 37. Pen Tool Project - Part 2 (4:48): http://www.screenr.com/p3L7 How to add a layer style stroke around shapes. 38. Pen Tool Project - Part 3 (3:55): http://www.screenr.com/s6L7 Creating lines (not closed shapes) with the Pen Tool, and how to merge multiple vector shapes together into 1 layer. _________________________________________________________________________________________________________________________________ Before going on, Take Quiz 1. See me. _________________________________________________________________________________________________________________________________ |
|
||
|
39. Selecting Areas - Marquee Tool (5:00): http://www.screenr.com/AXt7
How to select certain areas of layer using the Marquee Tool, and examples of things you can do with a selection (Copy, Paste, Fill, Draw, Free Transform). _________________________________________________________________________________________________________________________________ |
|
40. Selecting Areas - Lasso Tools (4:57): http://www.screenr.com/BOt7
The lasso tools (Basic, Polygonal, & Magnetic) give you more freedom to select unique shapes. 41. Deleting Lasso Points & Selecting the Inverse (1:56): http://www.screenr.com/pOt7 Using "backspace" to delete unwanted lasso points, and selecting the inverse of a selection. _________________________________________________________________________________________________________________________________ |
|
||
|
(If you need a refresher on the Magnetic Lasso Tool, re-watch the last 2 videos).
_________________________________________________________________________________________________________________________________ |
|
||
|
42. Magic Wand Tool (4:17): http://www.screenr.com/JFt7
_________________________________________________________________________________________________________________________________ |
|
||
|
43. Quick Selection Tool (3:29): http://www.screenr.com/jFt7
_________________________________________________________________________________________________________________________________ |
|
||
|
44. Selecting a Color Range (3:27): http://www.screenr.com/FLt7
_________________________________________________________________________________________________________________________________ |
|
||
|
45. Layer Masks - Part 1 (4:59): http://www.screenr.com/UOi7
More in-depth look into layer masks & how they work. 46. Layer Masks - Part 2 (3:52): http://www.screenr.com/tOi7 Watch to find out why you shouldn't just erase/delete portions of a picture. NOTE: To temporarily hide a layer mask (like I was doing in the videos), simply hold down SHIFT and click on the layer mask. This puts a big red "X" over the mask. To reveal it, hold down SHIFT & click it again. _________________________________________________________________________________________________________________________________ |
|
|
47. Layer Effects - Part 1 (4:35): http://www.screenr.com/wiP7
(http://www.youtube.com/watch?v=yk6zCZ-fiAQ) Explains the various layer effects: Bevel & Emboss, Stroke, Inner Shadow, Inner Glow, & Color Overlay. 48. Layer Effects - Part 2 (4:57): http://www.screenr.com/uwP7 (http://www.youtube.com/watch?v=IvVOaKWEPUw) Explains the final layer effects: Gradient Overlay, Pattern Overlay, Outer Glow, & Drop Shadow _________________________________________________________________________________________________________________________________ |
|
49. Crop Tool (3:43): http://www.screenr.com/ywi7
(http://www.youtube.com/watch?v=XIbVo2_FxA8) How to crop & straighten a photo using the crop tool. _________________________________________________________________________________________________________________________________ 50. Image Size (2:22): http://www.screenr.com/bwi7 (http://www.youtube.com/watch?v=4Yr5YNLKfaU) How to find the height, width, and resolution (dpi) of your document. How to change the size of your document using "Image Size." _________________________________________________________________________________________________________________________________ |
|
||||
Photo Editing:
|
Overview for remaining Projects/Assignments (4:56): http://www.screenr.com/lj97
(http://www.youtube.com/watch?v=9z1XKrEBXBk) What pictures to use for the remaining projects & assignments. (Your own or sxc.hu) 51. Levels (4:42): http://www.screenr.com/uj97 (http://www.youtube.com/watch?v=njgSIw6P0nU) Introducing adjustment layers (permanent vs. non-destructive), & using "Levels" to add contrast to a photo. 52. Curves (5:00): http://www.screenr.com/Jj97 (http://www.youtube.com/watch?v=19sLile3qUw) Using "Curves" to add contrast to a photo. 53. Color Balance (3:50): http://www.screenr.com/Pj97 (http://www.youtube.com/watch?v=gMmD7swTLvA) Using "Color Balance" to adjust the color tones of a photo. _________________________________________________________________________________________________________________________________ |
|
54. Turning a Photo Black & White (3:17): http://www.screenr.com/97y7
(http://www.youtube.com/watch?v=CZUKiv5JX3c) _________________________________________________________________________________________________________________________________ |
|
55. Colorizing a Photo (1:15): http://www.screenr.com/ASj7
(http://www.youtube.com/watch?v=rDoDMQW-0pk) Making a photo all 1 color (example: sepia tone). __________________________________________________________________________________________________________________________________ |
|
56. Selective Color (4:59): http://www.screenr.com/cSj7
(http://www.youtube.com/watch?v=ZFtamX-CnMw) How to create a selective color photo. 57. Masking Multiple Layers (2:58): http://www.screenr.com/tSj7 (http://www.youtube.com/watch?v=GzxMEMfoHRc) Using 1 layer mask to mask off multiple layers. NOTE: You only have to watch the first 1:50 minutes of this tutorial. I stumble through the final minute & it may just confuse you. :) haha __________________________________________________________________________________________________________________________________ |
|
58. Spot Healing Brush Tool (4:56): http://www.screenr.com/iwHH
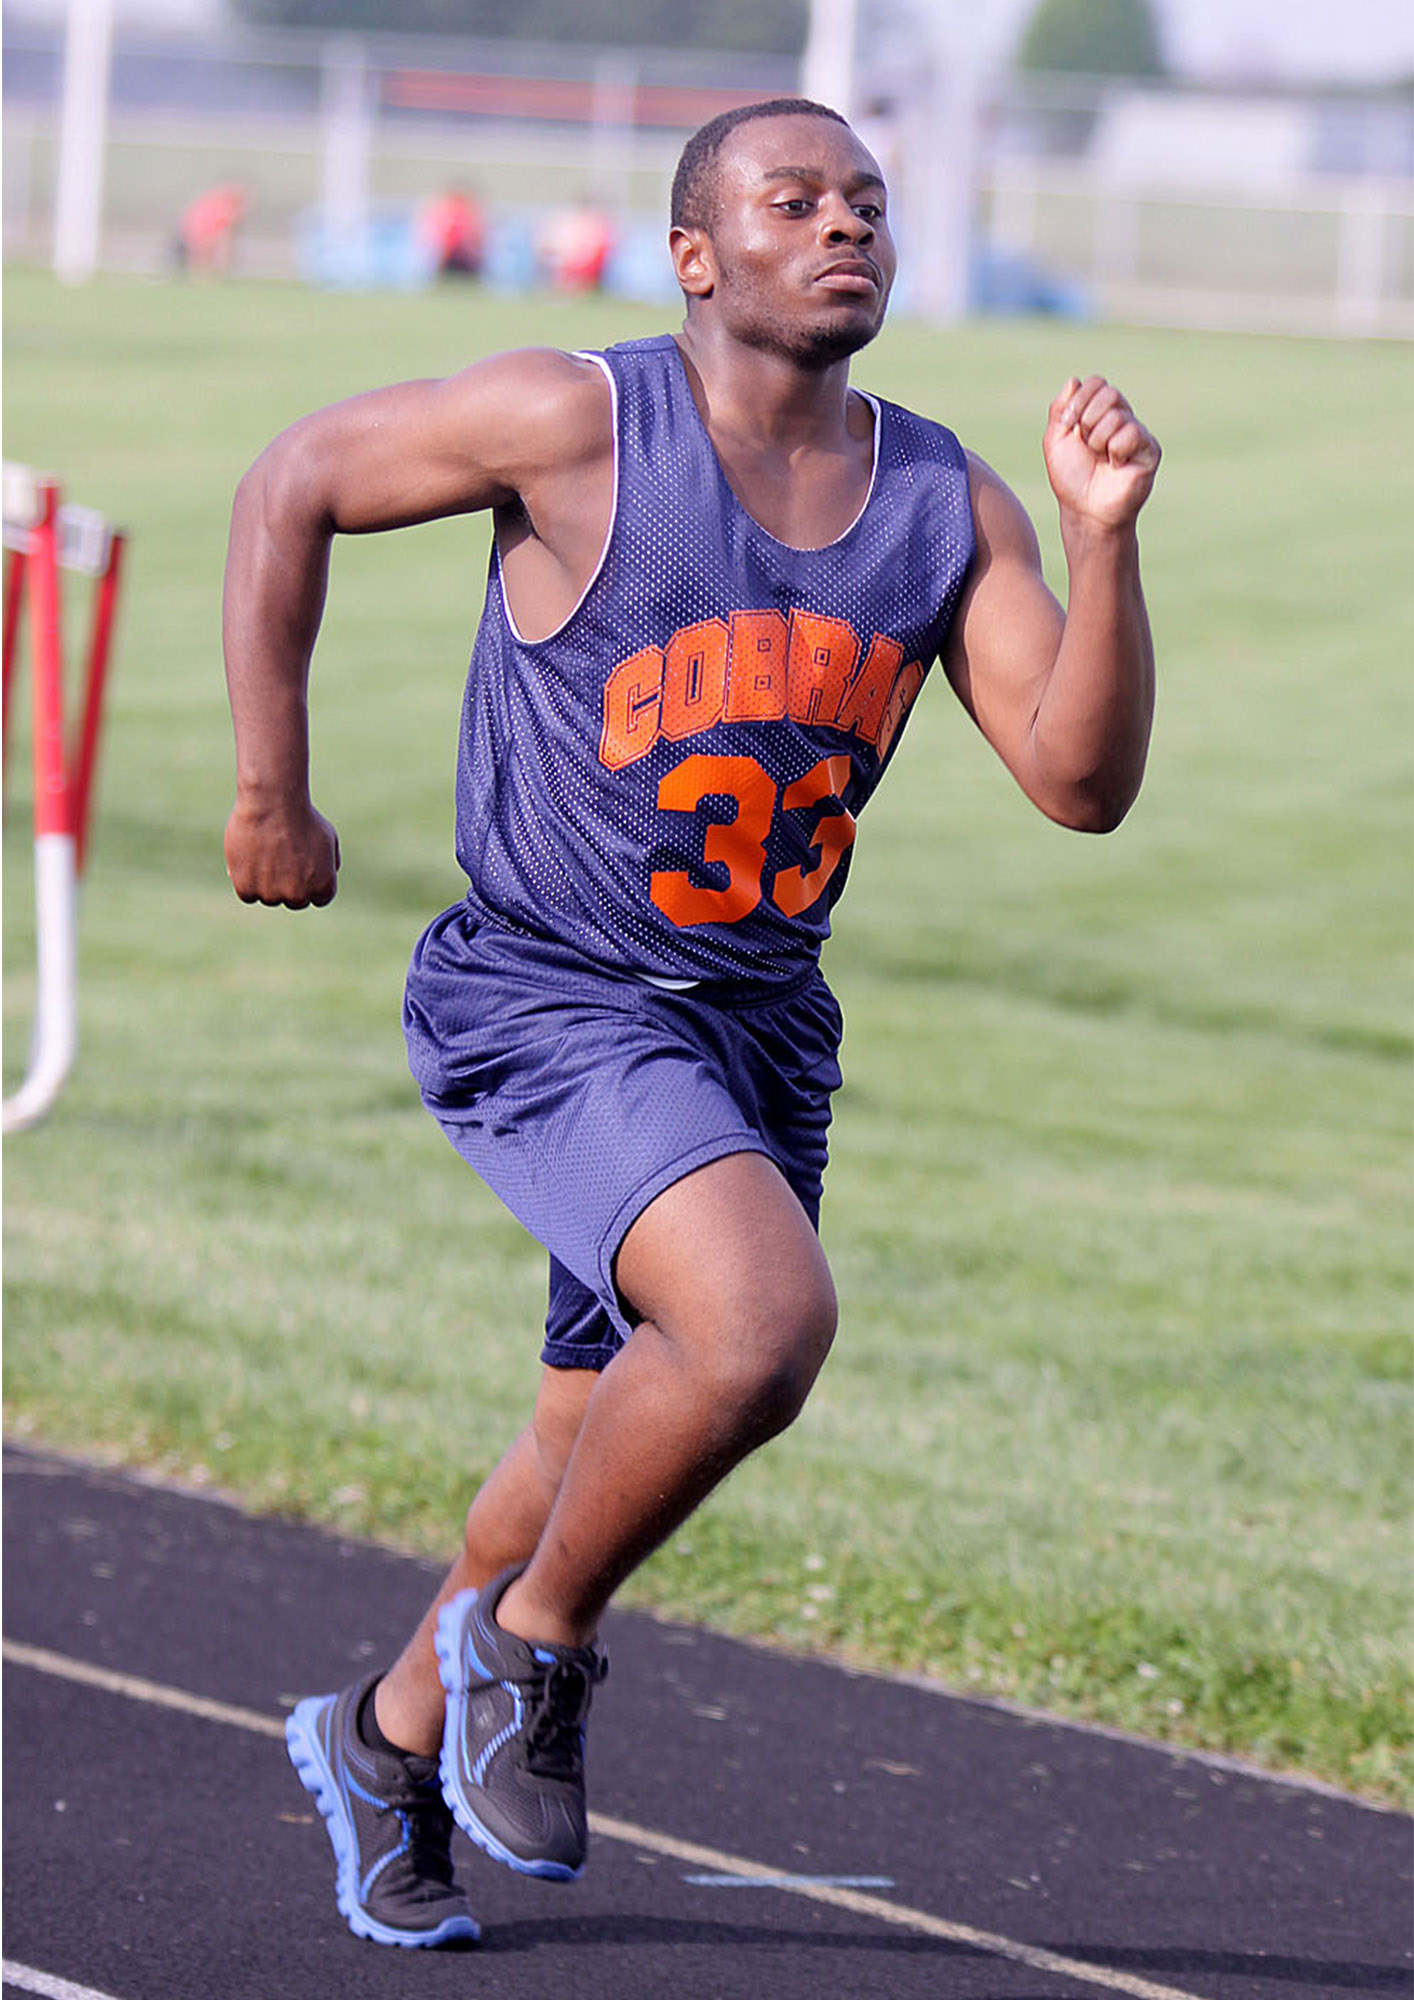
(http://www.youtube.com/watch?v=D3-uexRCmEw) Removing & replacing circular selections of a picture. 59. Patch Tool (2:44): http://www.screenr.com/M9HH (http://www.youtube.com/watch?v=7ksx5mRud4Q) Removing & replacing custom selections of a picture. 60. Clone Stamp Tool (3:41): http://www.screenr.com/Z9HH (http://www.youtube.com/watch?v=2aa_JzbmFPo) Copying areas of a photo. 61. Red Eye Removal (0:58): http://www.screenr.com/u9HH (http://www.youtube.com/watch?v=QsyhDY3J7BY) Quickly removing red eye with the Red Eye Tool. 62. Photo Improvement Assignment Example (3:49): http://www.screenr.com/xVHH (http://www.youtube.com/watch?v=li7Jl8W8CjQ) __________________________________________________________________________________________________________________________________ |
